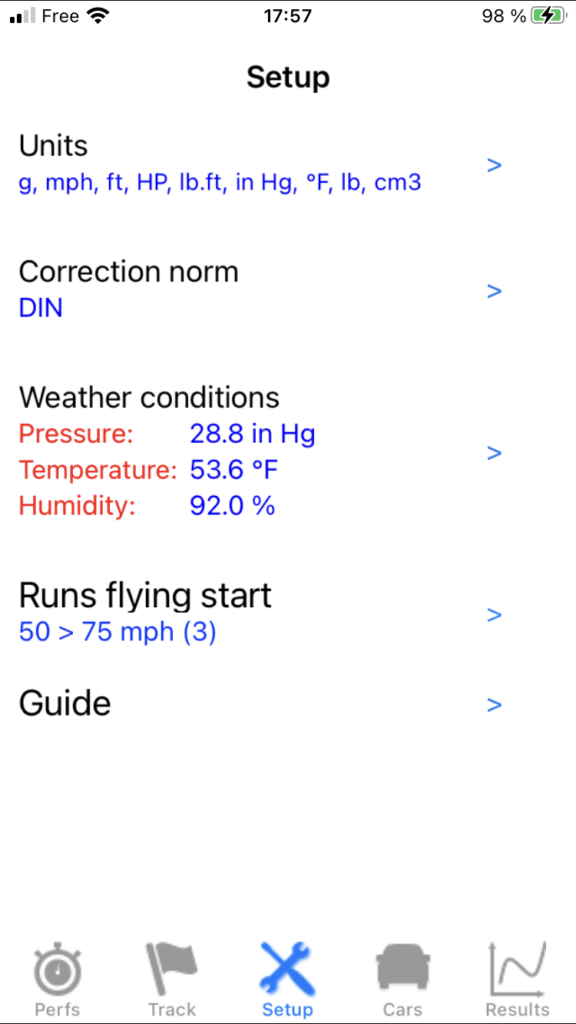
I) Configuring the application (Setup)
Go to the Setup screen (accessible by pressing the Setup icon -the 3rd, in the middle-).
You must perform all the desired settings (depending on the type of measurement) from top to bottom, i.e.:
- The choice of units / colors (all types of measurement)
- The choice of measurement mode (all types of measurement) (soon available)
- The choice of power parameters (correction norm, weather conditions, losses calculation mode (soon available))
- The choice of performance simulation parameters (shift time) (soon available)
- The choice of accelerations parameters (end speed, type of measurement stop) (soon available)
- The choice of runs flying start parameters (gear engaged, start and end speed)
- The choice of braking parameters (start speed) (soon available)
- The choice of rev calibration parameters (calibration rev) (soon available)
- The choice of losses measurement parameters (start speed, measurement duration) (soon available)
All the necessary explanations are already given in the application, you just have to follow them. If these are sufficient for you, you can move on to chapter II. Otherwise, details are given to you below.
0) Global
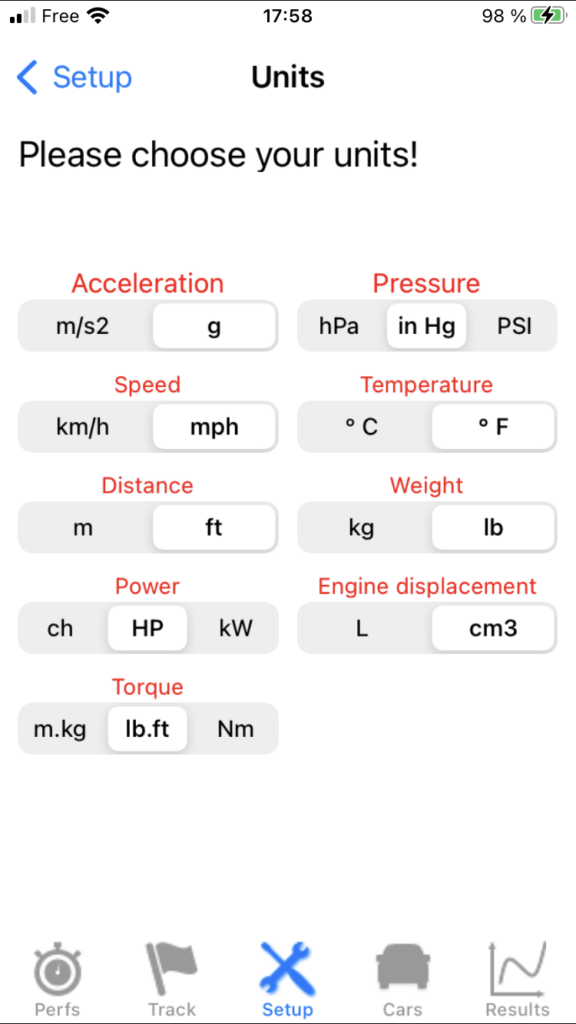
A) Units
Press Units. A list of 9 physical quantities is displayed, for each of them you must choose its unit (metric or imperial in general), by selecting the desired unit. Once all units have been chosen, return to the Setup screen by pressing the BACK button.
B) Measurement mode (sensors) (soon available)
1) Power
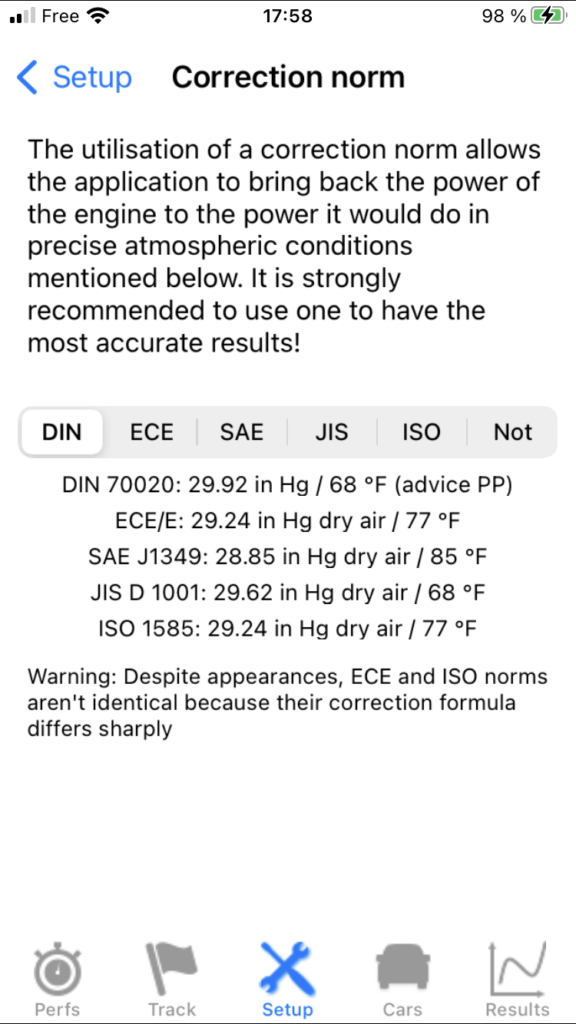
A) Correction norm
Press Correction norm, then choose your correction norm from the five offered (although you can choose not to use one). Indications are displayed on the screen to help you in your choice. Once the correction norm has been chosen, return to the Setup screen by pressing the BACK button.
Note 1: The three major roles of the correction norm are:
- Define a reference weather standard
- “Bring back” the power and torque results measured for a given engine to those that this engine would deliver in this reference weather standard using a correction formula
- Allow equalization of measurement results whatever the weather conditions (and therefore also the location) at the time of measurements!
Note 2: NEVER neglect the influence of weather conditions -and therefore the importance of the correction norm- on the results! This is a typical mistake among beginners or non-specialist amateurs. Conversely, you will NEVER see a professional or a specialist amateur make this mistake!
Note 3: Of course, the efficiency of this correction norm can not be perfect, especially if you make your measurements in extreme climatic conditions, especially since (paradoxically… apparently!) your car is recent, because the ECUs more and more modify the engine performances according to the weather conditions, which no standardized correction formula can anticipate! The best way to limit this phenomenon is obviously to make your measurements in weather conditions relatively close to those of the standard used, and the designers of the standards themselves guarantee a good efficiency of their standard in a temperature range of +- 10° C & 18° F around the reference temperature.
Note 4: It is therefore strongly recommended to choose one for the most reliable results possible, and PerfectPower recommends the DIN norm which has proven its astonishing efficiency both during two serious scientific studies (California and Brazil) and over years and thousands of measurements from the PerfectPower Lab!
B) Weather conditions
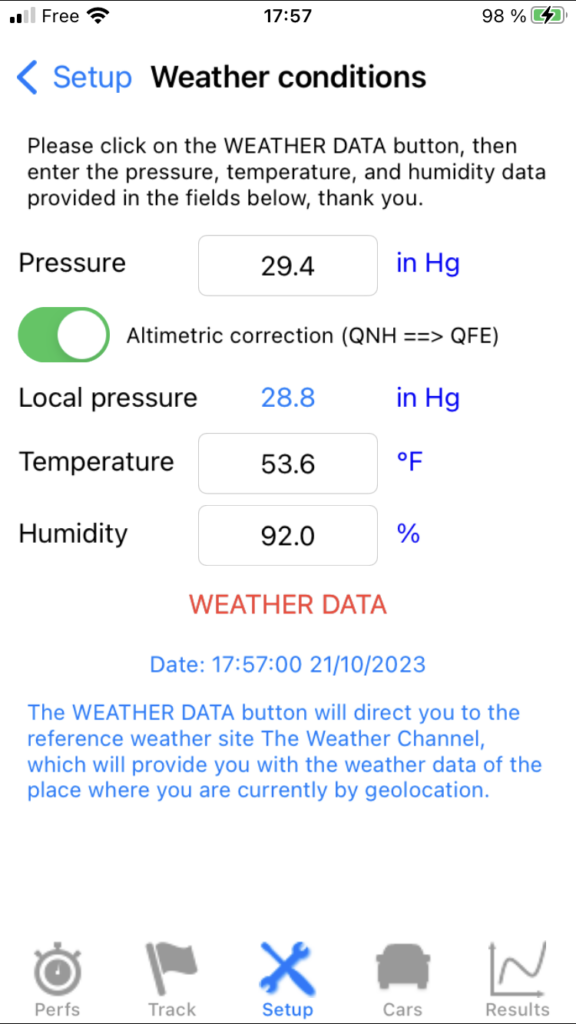
Press Weather conditions, then enter the current weather conditions of your measurement location in the 3 dedicated weather fields: Pressure, Temperature, and Humidity. Once the weather conditions have been entered, return to the Setup screen by pressing the BACK button.
Note 1: Entering the weather conditions is ESSENTIAL: indeed, these ones are not only necessary for the correction of the engine results made by the correction norm configured just before, but they are also necessary for the dynamic calculation of the air resistance during measurements!
Note 2: PerfectPower provides you with valuable assistance (function of manual recovery of weather data) by providing you with a link to The Weather Channel website which will provide you with weather data for where you are currently by geolocation: you just need to click on the Weather Data button located just below the 3 weather fields, read these 3 weather data (Pressure, Temperature, and Humidity) on The Weather Channel website, and finally enter them in the 3 weather fields after returning to the Weather screen, and that’s all!
Well, almost everything, because in this case you must also check the “Altimetric correction (QNH ==> QFE)” box, which will correct the pressure returned by The Weather Channel website and which is a standardized pressure at the sea level (named QNH), into a local pressure at the altitude where you are currently (named QFE), and which is obviously the one that PerfectPower must use for its calculations!
Note 3: For information, the pressure returned by all official weather stations worldwide is always a QNH by default, it is only a QFE when it is explicitly specified in the returned report with also the mention of the altitude of the station. Please remember this if you use a weather station other than that of the reference weather website The Weather Channel used by PerfectPower.
Note 4: Please note, it is necessary to wait approximately 10 s in the Perfs screen after opening the application (time to obtain a sufficiently accurate GPS signal) before going to this Weather screen to manually recover the weather data! Indeed, the GPS being cut off as soon as you exit the Perfs screen to save battery, the GPS information used for manual recovery of weather data is that recorded at the precise moment when you leave the Perfs screen to go to the Weather screen, and they only exist (and are reliable) from around 10 s after opening the application.
C) Losses calculation mode (soon available)
2) Performance Simulator (soon available)
3) Accelerations (soon available)
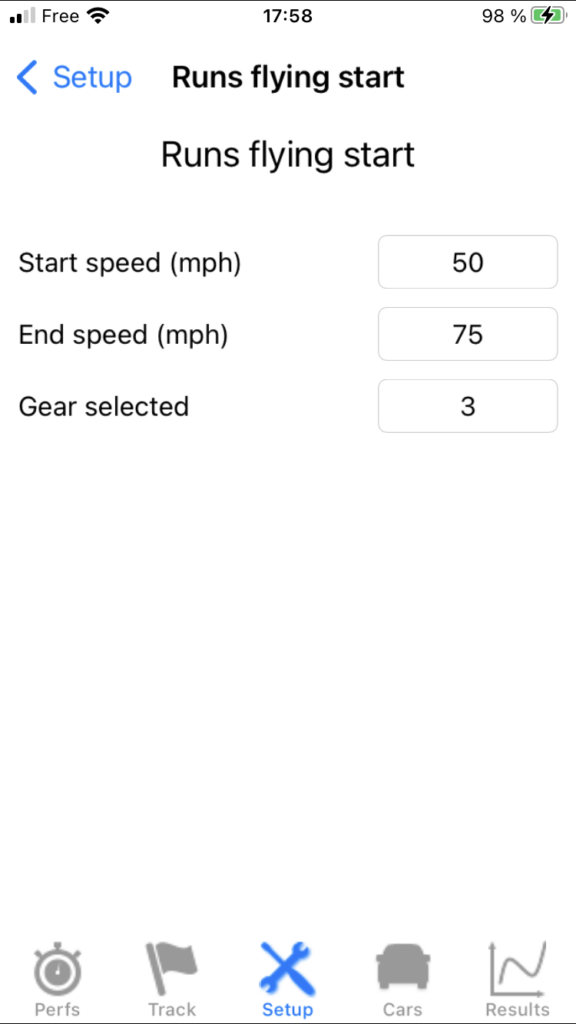
4) Runs flying start
Press Runs flying start, then choose:
- The gear engaged
- The start speed
- The end speed
Once this setting has been made, return to the Setup screen by pressing the BACK button.
Note 1: It is of course the gear engaged at the start of the run which must be selected. For example, if you want to do a 40-100 mph in 2/3/4, you must enter the gear 2.
Note 2: In reality, these three runs flying start parameters are also used by… the performance simulator!